This article offers a simple demonstration of the capabilities of the OX API using Python. While written with assumptions of general Python knowledge around pip and CLI (Command-Line Interface) usage, developers of any language may borrow the same concepts used in this example or even use this CLI as the “engine” powering their own custom solutions.
This article features 3 sections:
- Obtaining the OX API Key
- Using this Python CLI Example
- Under the Hood – How it Works
Obtaining the API Key

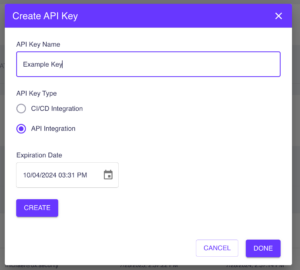
To get started, access the OX Settings Page and navigate to the tab entitled API KEY.
From there, choose API Integration and define an expiration date before creating the key.
Once displayed, store the key in a safe location as the key will never be revealed
again. Users may only modify the expiration or disable keys after they have been created.
At the time of this writing, API functionality exposed to users focuses on Read-Only actions. The API key will grant full permissions to read all applications and issue data exposed by the organization it belongs to. Customers are urged to devise a key rotation scheme that makes sense according to their organization’s security policy.
Using the Python CLI Example
Download/clone the contents of the following repo into a folder: Python API Client
From MacOS, use Terminal. For Windows, use either a CMD line or Powershell.
Refer to either Python or OS documentation for details on how to set the Windows/MacOS path for python execution. From the command line, either for Windows or MacOS, typing in python -V should reveal proper execution of Python. If the path to Python has already been defined, this command should reveal the Python version installed.
This CLI has been tested on multiple versions of Python 3 on both Windows and MacOS.
Initial setup:
- Open the python_examp.py file using your favorite text editor
- Copy/paste the OX API Key into line 37, and if necessary modify the API URL on line 36
- Using your command line of choice, navigate to the folder containing the downloaded files
- Use pip install -r requirements.txt to install the dependencies required by this CLI
- Use python python_examp.py help to get a list of commands
You should see:
This example reveals the usage of the CLI which is: python_examp.py <queryname>.
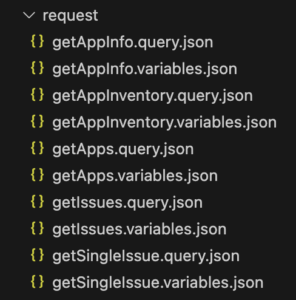
The details of each query exist in the ~/request folder:
Each query has 2 files associated with it.
GraphQL queries consist of both query and variable JSON objects that are submitted with each API
request. In the event there are no variables required, the variables block will contain an empty object {}.
Outside of the scope of this document are details around the configurability of GraphQL queries and
variables for OX. At a high level, queries enable the user to identify the JSON elements of the server
response, and variables enable variations of the data returned.
In this example, query and variable files have been configured for general usage. Upon inspection, notice the default entries for time based fields are defined as Javascript Epoch Time long values.
The Python CLI performs the following functions:
Execute GraphQL API query specified
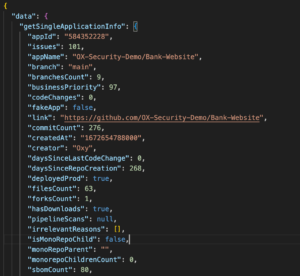
Store JSON response as filename queryname_response.json
If <queryname> = getissues, expose some fields of the getissues response
Expected output of python python_examp.py getissues

Under the Hood – How it Works
Execution begins on line 34 of the python_examp.py code, re-numbered here to 1-33:
# BEGIN EXECUTION FLOW --------------------
# OX GraphQL Info - consider encrypting into protected .env file or accepting as args instead of having in code
apiurl = 'https://api.cloud.ox.security/api/apollo-gateway'
key = 'api_key_here'

if (len(sys.argv) < 2):
  print('You must enter the name of the query to submit. Query filenames should contain .query.json and .varia
  exit()

usrAction = sys.argv[1].lower()

if usrAction == 'help':
  print('Use any of the following queries as an argument: python_examp.py queryname')
  print('getissues')
  print('getsingleissue')
  print('getapps')
  print('getappinventory')
  print('getappinfo')
  exit()

# Reading Query and Variables files for GraphQL API
qFilename = './request/' + usrAction + '.query.json'
vFilename = './request/' + usrAction + '.variables.json'

if os.path.exists(qFilename) == False:
  print('Query filename '+qFilename+' does not exist. This file should contain the GraphQL query. The Variable
  exit()

with open(qFilename, 'r') as query_file:
query = query_file.read()

with open(vFilename, 'r') as variables_file:
variables = json.load(variables_file)
Key elements of this code snippet:
- Lines 3-4 contain API information – consider moving these to a function accessing a protected file, at least for the API key
- Lines 6-10 capture the query name, with 12-19 listing the available commands if “help” is requested
- Lines 21-33 correlate the query name to the files and store their contents into query and variables
The remainder of execution, lines 68-96, assembles the API header and body, then sends the request off to the OX server:
# Setting Post Params

headers = {
'Content-Type': 'application/json',
'Authorization': f'{key}',
}

body = {
'query': query,
'variables': variables,
}

# Post Request

try:
response = requests.post(apiurl, headers=headers, json=body)
if response.status_code == 200:
  result = response.json()
  passresult = json.dumps(result, indent=2)
  # show_issues(passresult)
  fileN = usrAction+'_response'
  writeJSON(fileN,passresult)
if usrAction == 'getissues':
  show_issues(passresult)
else:
  print(f'GraphQL request failed with status code: {response.status_code}')

except requests.exceptions.RequestException as error:
print(f'Error: {error}')
Key elements:
- Lines 3-11 prepare the server request
- Lines 15-29 handle the server response
- If successful, lines 18-24 utilize one or both of the functions in the script
# FUNCTIONS ------------------
# Deserialize Function using JSONPICKLE
def show_issues (response):
#frozen = jsonpickle.encode(response)
jsonObject = jsonpickle.decode(response)

for check in jsonObject['data']['getIssues']['issues']:
id = check['id']
desc = check['mainTitle']
owners = check['owners']
print("Issue ID:", id)
print("Issue Description:", desc)
print("Issue Owners:", owners)

def writeJSON (fileN,response):
fileN = sys.argv[1]+'_response'
if os.path.exists(fileN+'.temp') == True:
  os.remove(fileN+'.temp')
  writefile = open(fileN + '.temp', 'w')
  writefile.write(passresult)
  writefile.close()
# WRITES AS TEMP FILE FIRST, THEN RENAMES WHEN COMPLETE (this enables easier integration from other processe
if os.path.exists(fileN+'.json') == True:
  os.remove(fileN+'.json')
  os.rename(fileN+'.temp',fileN+'.json')
Function showIssues:
- While numerous deserialization options exist, even through native Python commands, jsonpickle may be an attractive option for powerful JSON navigation with a single line of code (line 5 above)
- Lines 7-13 reveal how the object created by jsonpickle may be navigated by printing certain fields as opposed to exposing all of the output stored in the JSON response file
Function writeJSON:
- Lines 15-25 perform numerous file functions, specifically for the purpose of saving the JSON server response into a file named querycommand_response.json
- Disk activity performs the process of deleting existing files, writing into a temp file and renaming to a .json extension once complete
- The file processes performed here are sufficient to support other applications that could shell/bash to this script and wait for the appearance of a file query_response.json


